Digital Prototyping for Design 03
This module is all about learning how to use different kinds of fabrication technologies for prototyping in all its forms, and then over a series of week long design tasks, we have to put the theory we learn into practice. We work with both traditional forms of fabrication (e.g. laser cutters, 3D printers, welding etc) but also with new and emerging forms of fabrication where we explore the potential of growing materials, manufacturing biomaterials and incorporating living organisms into our prototyping.
What follows are a series of entries, summarising the different design tasks, the design & thought process we went through, what we’ve learnt in each task and where it could go in the future.
I hope you enjoy reading about them, all the files you’d need and recipes to make the materials are available for each challenge so that you can follow along or improve on the designs as you explore.
Enjoy 😃
Module 3 ~ A first attempt at making furniture from scratch
Too Long Didn’t Read
In this module, our group (Nuria, Carmen, and I) designed and fabricated a large shelving unit for our classroom using a CNC router. Initially, we planned a slot-based design for easy assembly, but material constraints and stability issues led us to redesign. We settled on modular, stackable boxes with T-slot fasteners for stability, inspired by Ikea’s shelving system. Using tools like Fusion 360, Rhino, and Makercase, we refined our design and overcame CNC machine challenges. The project was a fun and valuable experience, enhancing our skills in digital prototyping and fabrication.
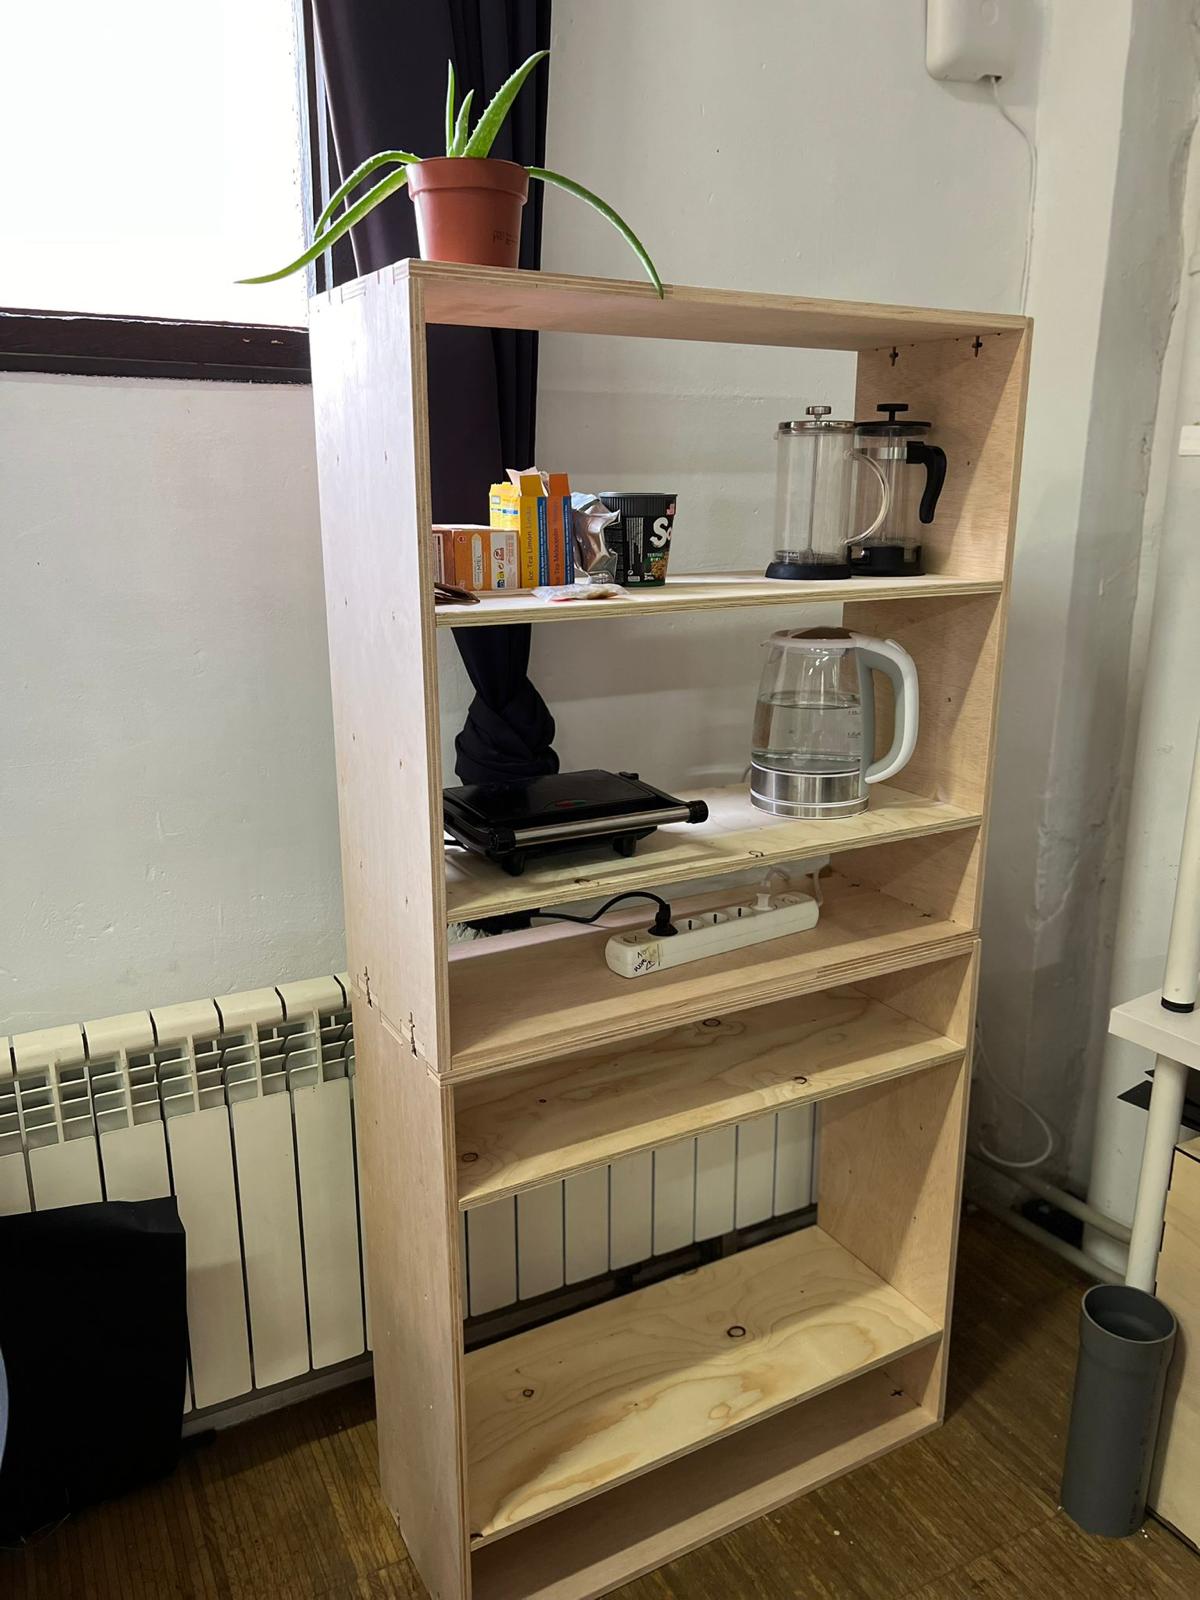
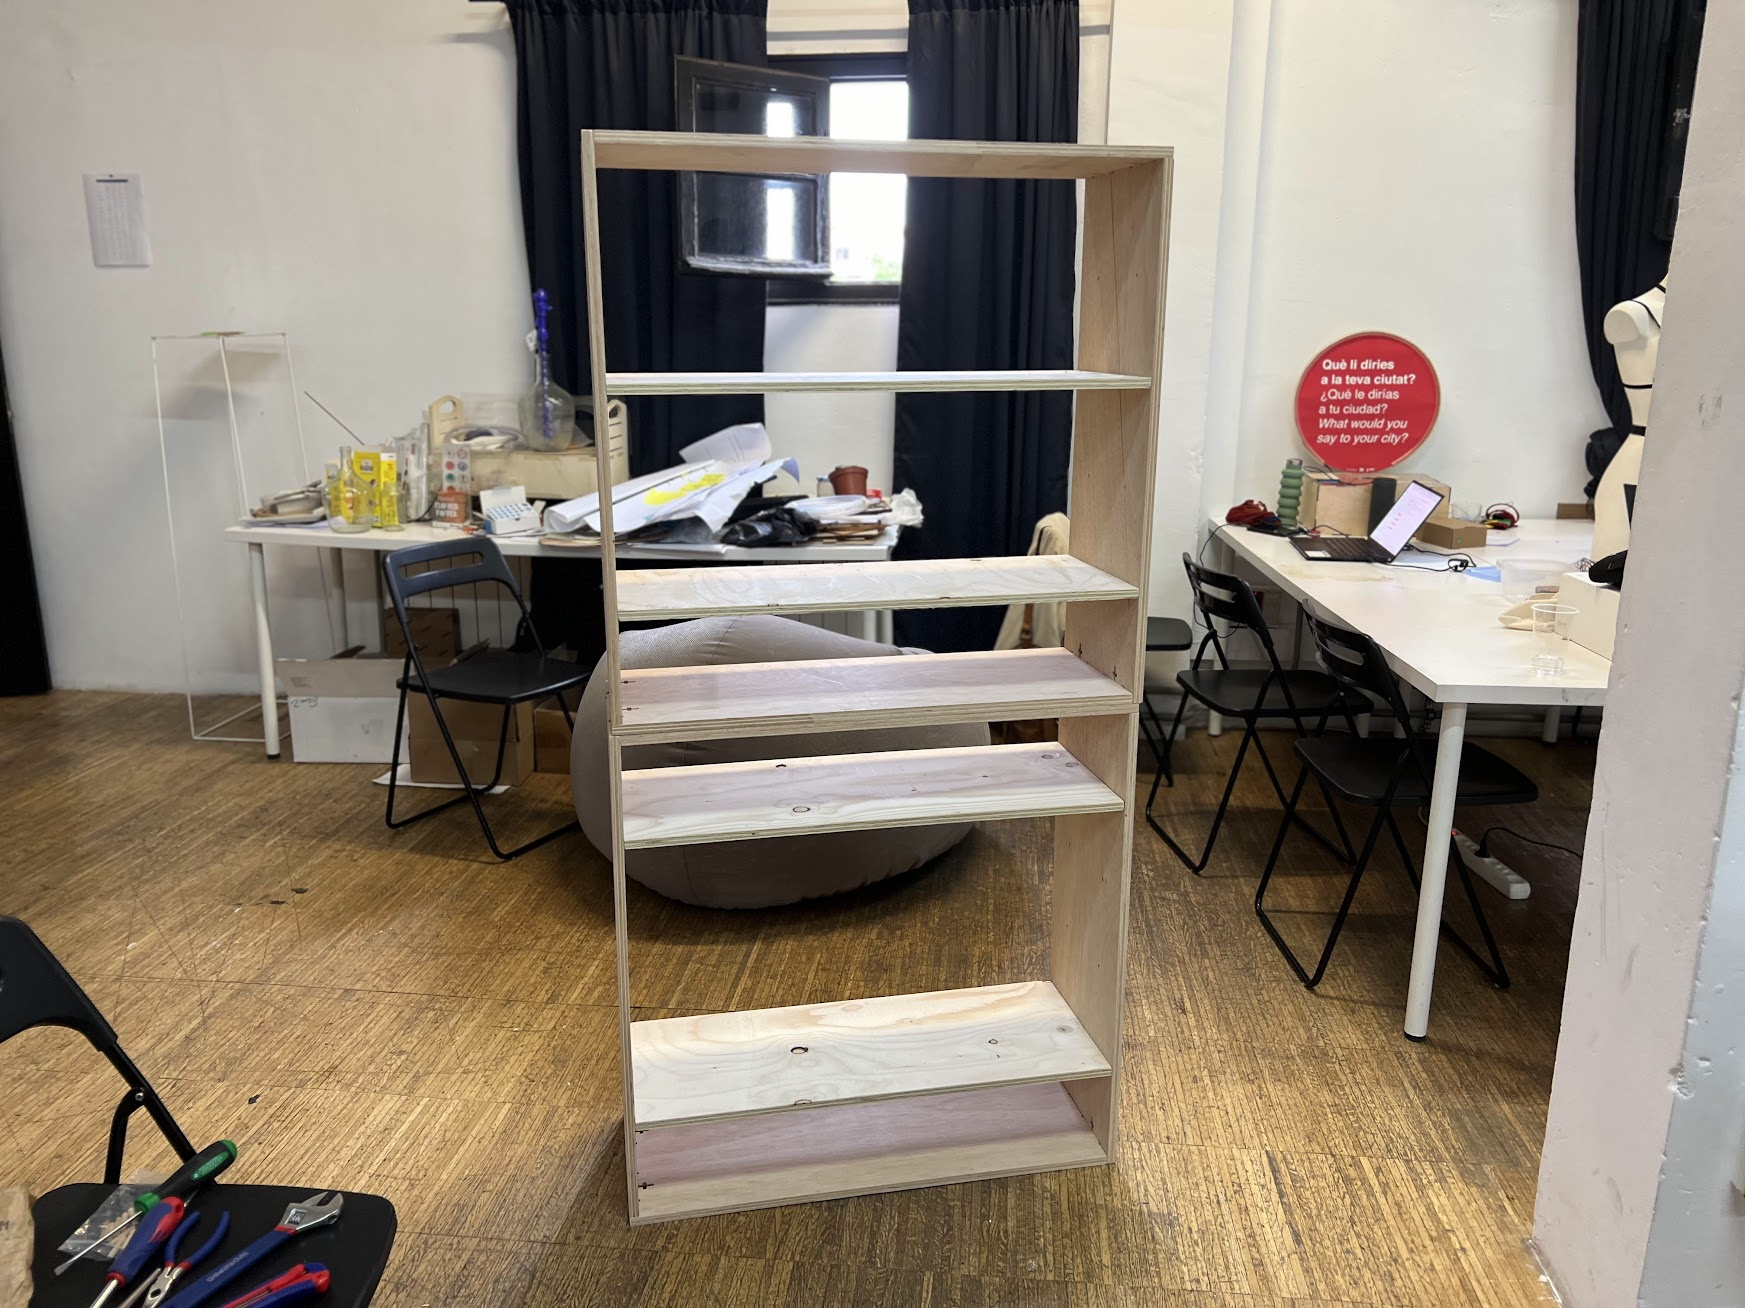
For this task we had to come together in groups to design and fabricate some furniture using the large CNC router for our classroom. Together with Nuria and Carmen we decided to combine our resources to create a large shelving unit that could be used to store the weird and wonderful collections of things and prototypes that our class had managed to accumulate throughout the year.
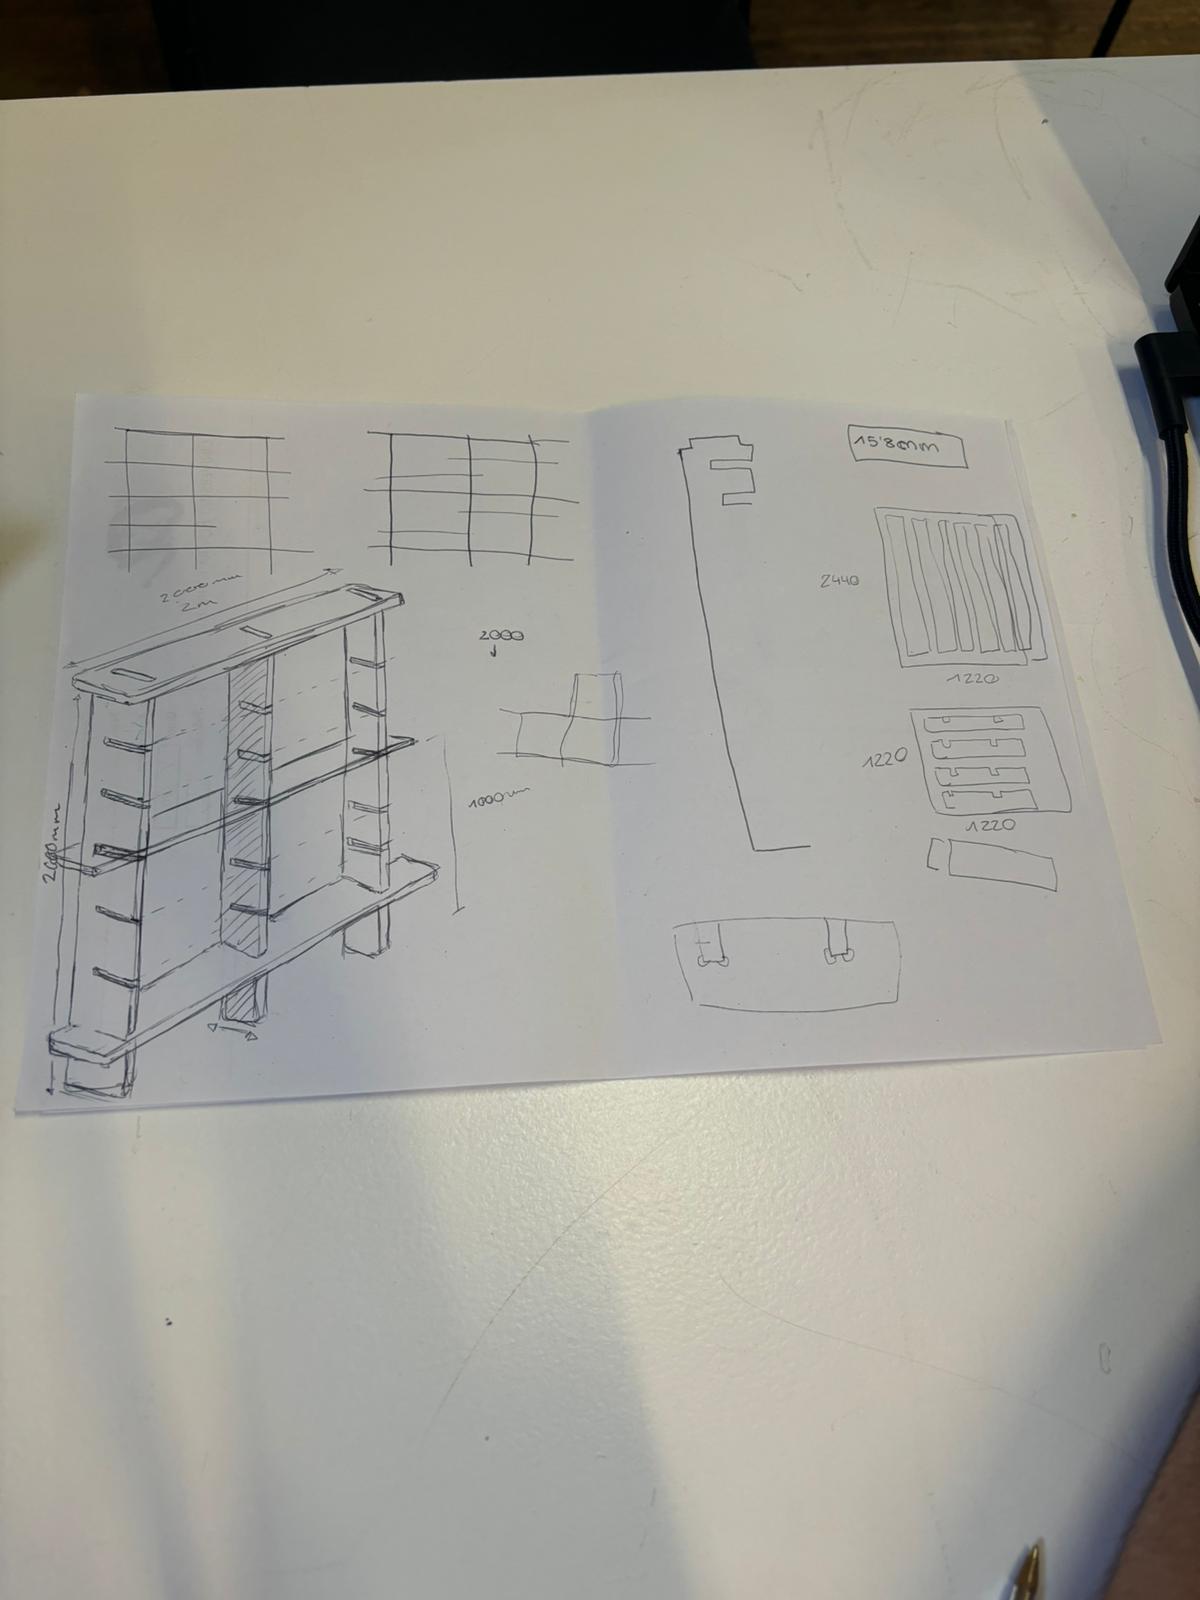
One of our main goals was always to keep it as simple to manufacture as we could. Our first design used a series of slots that would allow each piece to slide into the other securing it into place. At first this seemed like a solid strategy as it meant that it would need very little assembly time or extra fastening components like nuts and bolts.
Using Fusion 360 and Rhino to model up our different ideas was a quick and easy way to visualise them both on screen and in augmented reality but exporting the files as .USDZ file types, something I highly recommend if you want to quickly understand the scale of whatever it is you are designing! 😃
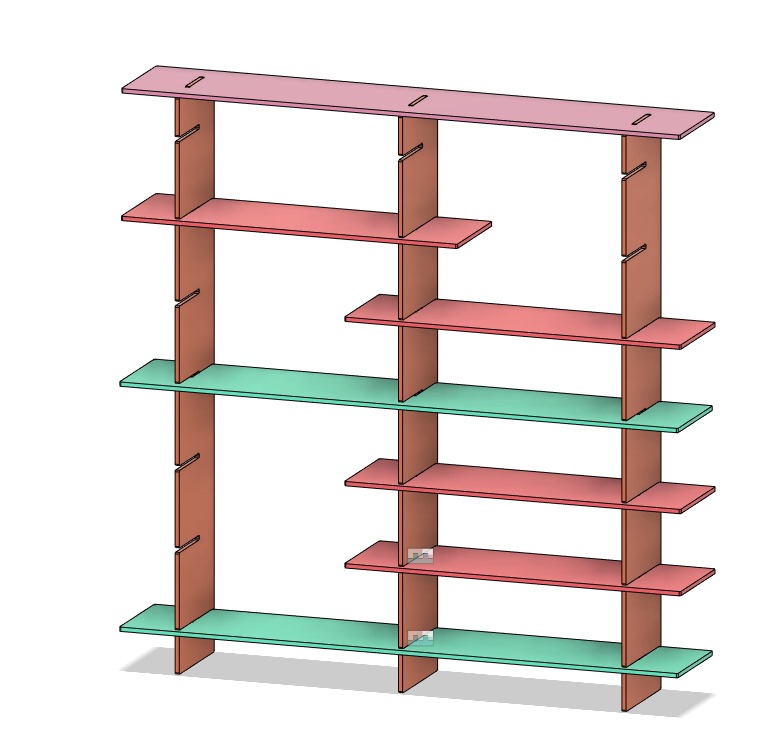
However, we quickly realised that we’d designed this thinking that we had more material than we actually did, sending us back to the drawing board to redesign the unit for the second time.
We opted to go for an L-shaped design that would fit within our material constraints yet still work with the original fastening mechanism we’d imagined, while also allowing us to maximise the storage space we could have.
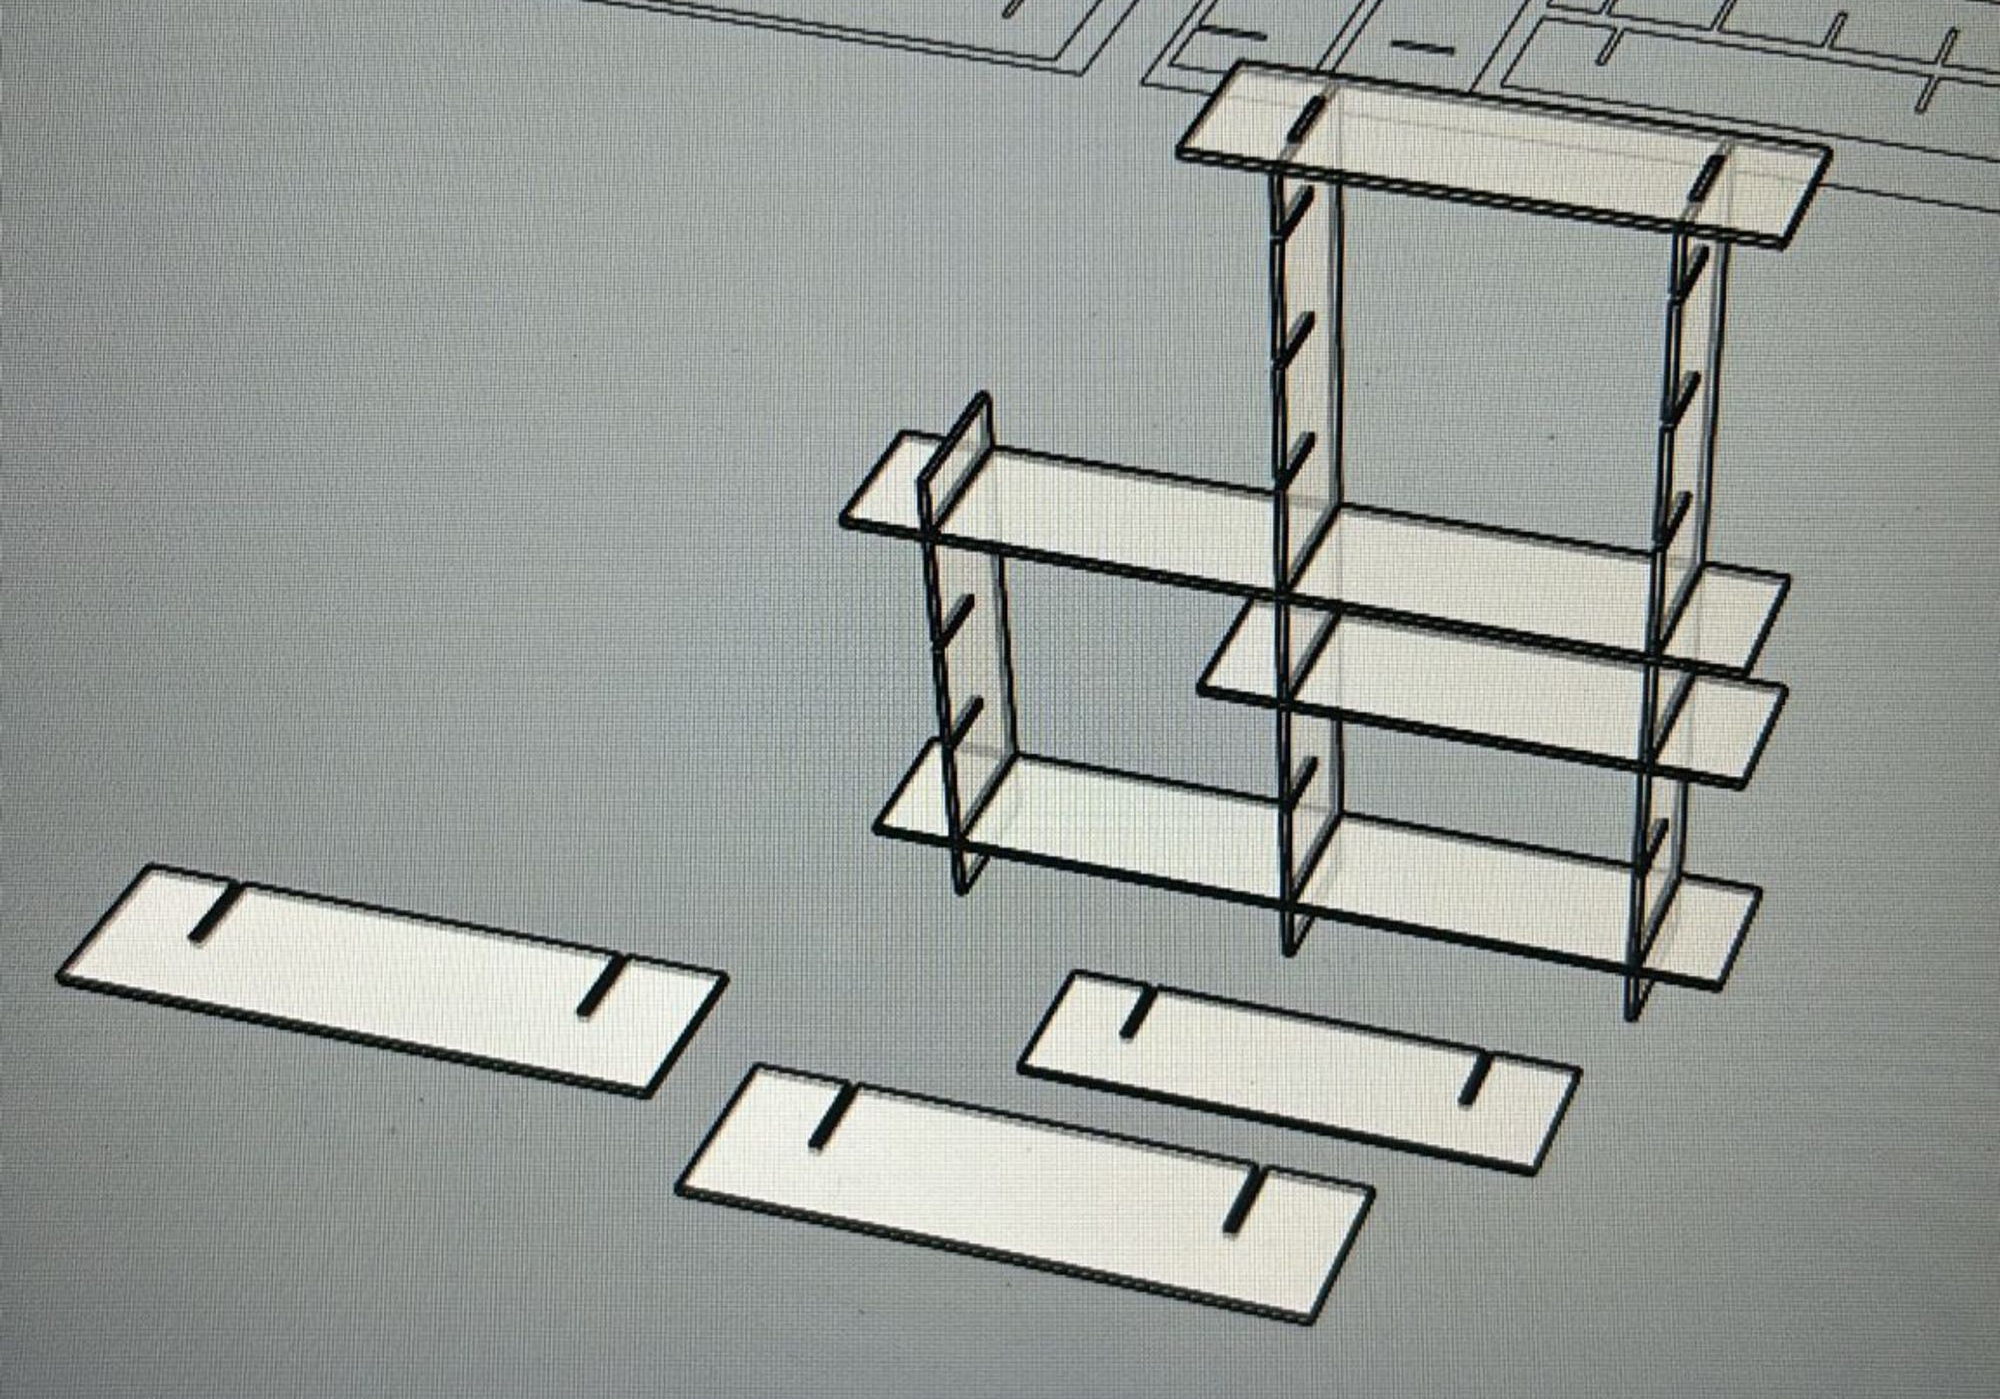
However, once we took this design in for review, we were told (and probably should have realised) that this structure on it’s own without any other fasteners would be unstable, as there was too much space on either side of the vertical slats, which would create an imbalance and potentially topple over the unit. Not so great.
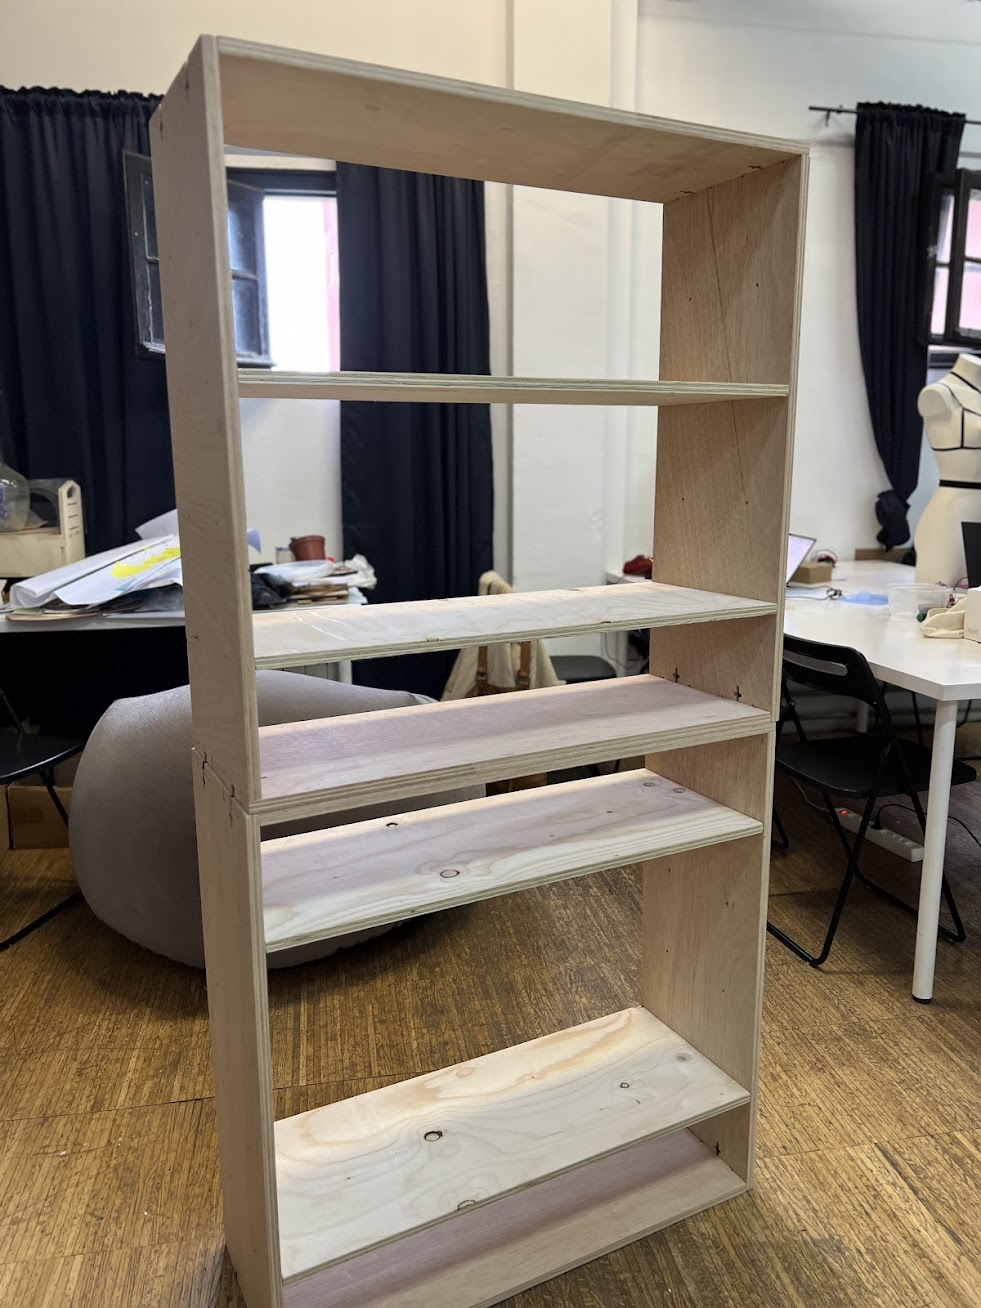
So after some back and forth with one of our teachers (thank you Adai 🙏) we settled on a new fastening system and a third and more stable design. We opted for modular and stackable boxes, would would fit within our material constraints and would allow us to make an infinitely repeatable structure to create any kind of shape we wanted.
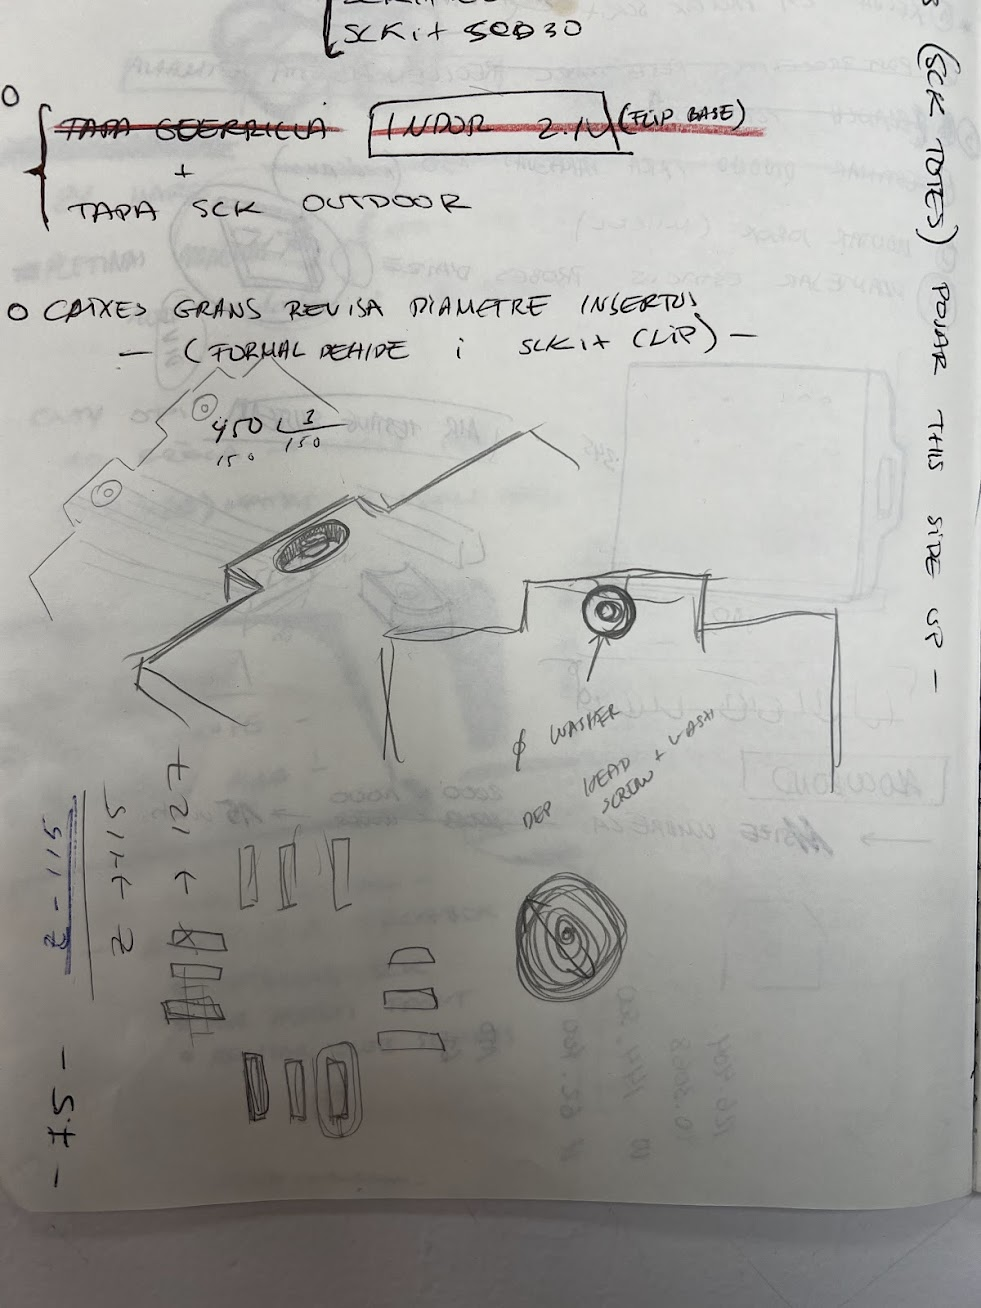

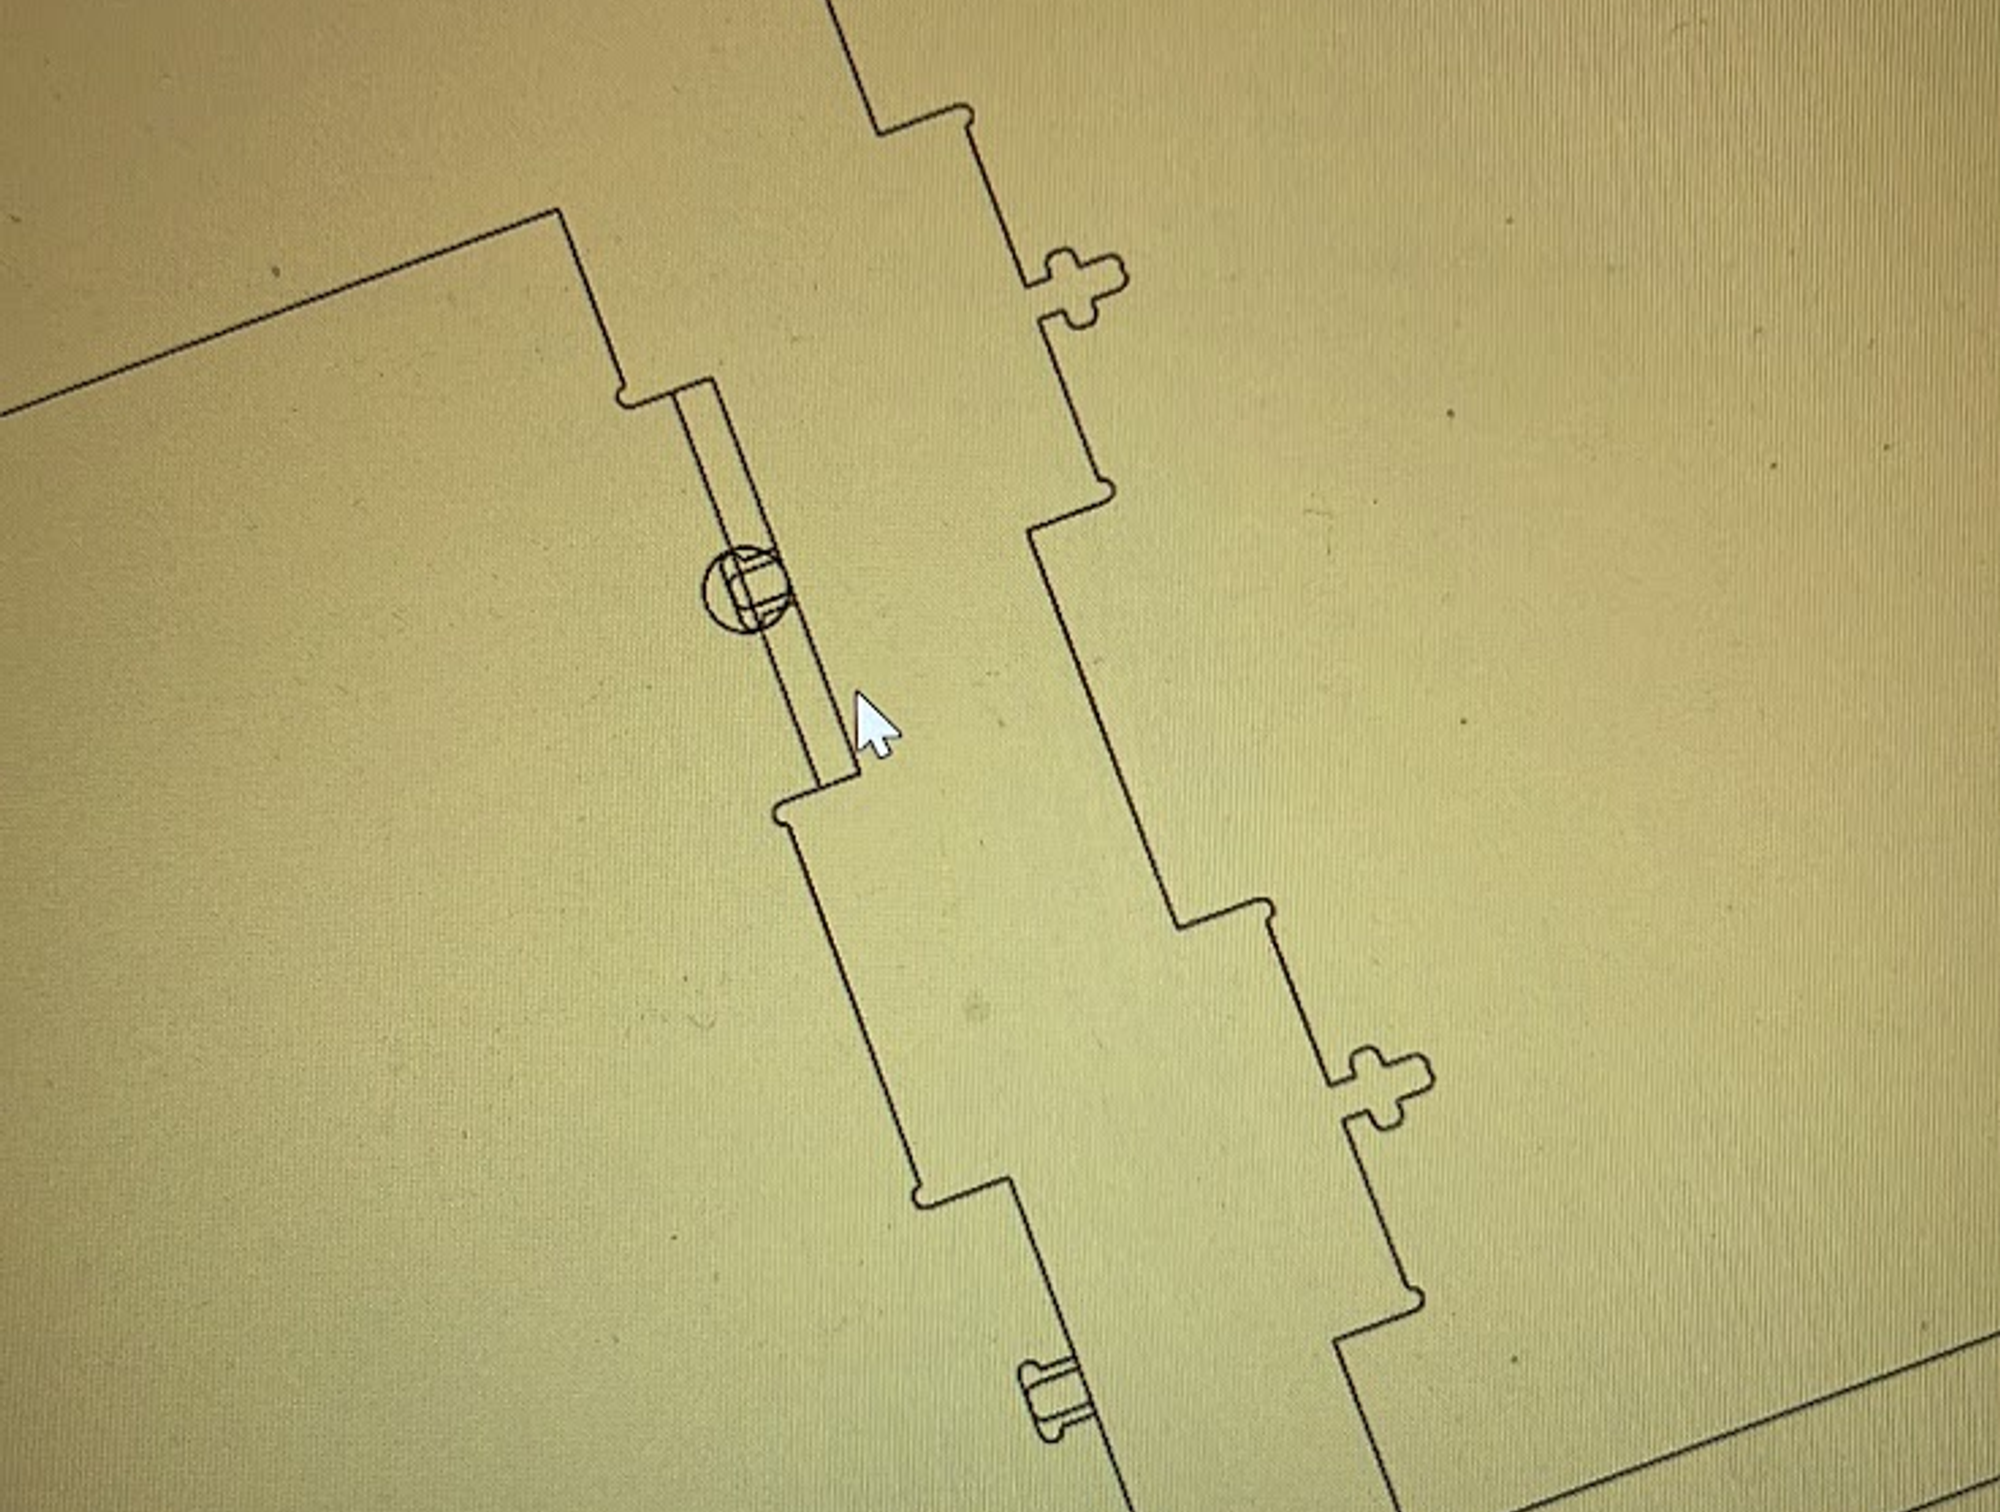
Using an online tool called Makercase, we were able to quickly streamline the process of making the required shapes, and then edit as needed to create the right fastening slots — in this case T-Slots.
We included small patterned holes in which we could insert some dowels to support shelves inside each of our cubes, taking inspiration from the way Ikea do their shelving as well.
We did however encounter some issues with the CNC machine itself, while we’d designed our shelving to be milled by an M4 bit, we learned that had been broken just before we headed down to the machine, so that required a quick bit of design change and then we were good to go. The T-slot positioning was adjusted to create structural pressure from all sides and when that was done we were finally ready to mill out our shelves.
This was a really fun project, I was excited to be able to experience using a large CNC milling machine like this as this was something completely new to me, and I really enjoyed the experience of designing something from scratch and bringing it to life through fabrication, I’d been missing doing that for a bit so I’m very glad we got the chance to do it again. These are new skills that I will definitely use in the future, and should really come in handy for helping to create whatever exhibition space we need for the MDEF Fest.
You can find all the fabrication files by clicking the button below 👇 it’ll give you access to everything you need to make your own version!
Module 4 ~ Sensing the Body
Too Long Didn’t Read
In this module, we learned the basics of machine learning using Wekinator, creating datasets, and training algorithms. We connected these models to physical sensors to produce outputs. Partnering with Marius and Nuria, we developed a soft sensor to detect pressure changes, using OSC messaging to send data between devices. We trained a model to recognize facial expressions using Face OSC, illustrating the importance of diverse datasets. Then, we applied our knowledge to our soft sensor, visualizing data through a gradient LED and sending outputs to a program called Processing. While not directly related to my thesis, this module introduced me to exciting new technologies and methods, showing how machine learning and sensor integration can be applied across various industries. It was a fun and enlightening experience, broadening my technical skills and opening up new possibilities for future projects.
This module introduced us to the basics of machine learning programs, creating datasets and training machine learning algorithms on that data using a program called Wekinator, and how we could connect these algorithms to physical sensors to produce outputs based on the data they receive.
Our teacher for this module was Citlali, a product designer and artist who specialises in exploring how we can use sensors on our bodies to create artistic output. Our task for this module was to play with creating outputs using different types of sensors and the body.
This module was very unrelated to what I had been researching and working for my thesis project so it was a nice break and challenge to focus on something completely different like this.
For this module I partnered up with Marius and Nuria, where we played around with creating a soft sensor, which is essentially made of textiles, to detect changes in pressure. With the idea that we could use a sensor like this one to detect when someone is running or walking based on the pressure difference applied by their feet as they moved.

Citlali introduced us to a technique called OSC messaging, which allows internet connected devices to communicate with each other (as long as they are connected via the same router, for this any kind of internet router will do, it doesn’t have to an active internet connection — it just needs to be switched on and broadcasting a connection port) and to a machine learning training tool called Wekinator.
Wekinator is able to receive inputs from multiple messaging sources (including OSC messaging) and send those to the machine learning algorithms to process and generate outputs.
To test this out we used a program called Face OSC, which uses a camera to do facial recognition by mapping multiple points onto your face and then send that data over OSC to wherever you want. This is particularly useful as it is accurate enough for us to be able to train a model to detect multiple expressions. In our case we decided to try and train a model to be able to distinguish between happy and neutral. To do this we trained the model several times on happy expressions and then neutral ones. We gave happy expressions an output value of 1 and neutral expressions a value of 0.
Once we finished training the model we were able to pretty accurately detect happy or neutral expressions through my laptop webcam. Though we did notice that it didn’t do so well when it was looking at the faces of other people, as it was just trained on my face, it means that it could only accurately do it for me. This just further illustrates how large and diverse datasets need to be to be able to provide accurate and usable information.

This was a lot of fun to experiment with and it was a really cool introduction to the world of machine learning. I can really see how we can apply this technologies across a lot of industries to help notice things that we otherwise might not be able to see.
So using our newfound knowledge, we set about training a new model on the pressure inputs from the soft sensor we’d quickly built out of some conductive textiles, crocodile clips and a barduino board. We added a nifty little feature that would change the colour of a neopixel LED mounted to the barduino board from green to red across a gradient as the pressure increased to help us visualise if the sensor was working or not.
Once we’d got our model trained we tested it out with the sensor and it worked! we were able to send data over OSC from the sensor connected to the barduino to the wekinator program and then even through to a programme called processing for further visualisation and complex output.

Because this was quite far away from my thesis project research I’m not sure how I could apply this to that research, but it was still a lot of fun nonetheless and I’m happy I’ve been able to be introduced to this new field (even if only just scratching the surface).
I’ve learned how to programme OSC messaging between devices, train a basic machine learning model and build soft sensors, it’s been a really fun week of learning and I’m excited to see how I could apply it to different projects in the future.
You can check out the code files and circuit files to try it out yourself below!
Module 5 ~ Extended Bodies
Too Long Didn’t Read
In this module, we expanded on technologies from module 4, using Wekinator and MAX-MSP to create audio-visual outputs from running data. Partnering with Marius, Nuria, and Carlotta, we utilized the ZIG Sim app to access phone sensors like the accelerometer and altimeter. Our goal was to change songs based on running or walking. We trained a machine learning model to recognize movement patterns and connected it to MAX-MSP for audio output. Despite varying individual results, we successfully created a dynamic music experience. This exercise showcased the potential of integrating machine learning with everyday activities and hinted at future applications for our thesis research.
In this module, we built on the knowledge and technologies we’d be introduced to in module 4. Using Wekinator once again to train a machine learning model to to process multiple inputs, and send them via OSC to a new program called MAX-MSP to create audio visual outputs that can be interpreted by ourselves or others.
Once again I partnered with Marius and Nuria, as well as Carlotta. We decided to keep exploring the idea of creating outputs from running. Except this time we changed our sensor device to something we all already carry with us when we go running, our phones.
In the previous module Citlali and also introduced us to an app you can download on your phone called “ZIG Sim”. This app allows you to access all the different sensors your phone has individually or together, from the accelerometer to the gyroscope, microphone and camera etc… and send that information over OSC messaging (among other ways) to another device to process that data.
This was incredibly cool and it completely opened up new possibilities that we could explore now that we had access to these sensors as well.
So to further develop our idea of creating outputs from running, we had an idea.
“What if we could change the songs you were listening to depending on if you were running or not?”
To explore this idea we decided to use the accelerometer and altimeter sensors of our phones to train a machine learning model in Wekinator to recognize the difference in cadence and speed between walking and running. Walking would be a, integer value of 0 and running would be a value of 1. We set the output values to be “float” values, meaning that as the sensor data is coming in it’s being compared to either 1 and 0 and the output moves in a range between the two integers instead of a binary output.
We connected the output values from Wekinator to Max-MSP, which would allow us to connect the values of 0 and 1 to two different audio outputs. In this case the audio outputs were two different songs, which would fade into one another depending on the cadence of your movement. Either playing the high bpm song for running or the low bpm song for walking.
It ended up working really well! we had a great time trying to determine the different thresholds between the songs, and we discovered that for every single person it would be different as everyone has a different way of walking and running. This time we tried to train it on the data received from multiple people running and walking so that we could have a larger sample size but even then, the results were a little spotty from time to time.
Nevertheless, we learned a great deal, how to use this new and incredibly powerful program (Max-MSP) and further develop slightly more complex machine learning models. I could totally see how these technologies could be combined to make for a really fun exercise experience for example. Imagine having music playlists connected to your heartbeat, as you performed different exercises you’d have different music that reflected each of those exercises, it could be a really fun way to explore a more audio sensory side to exercise or even meditation!
You can find all the code we wrote for this project by clicking on the button below! 👇
While this was again not directly connected or related to the thesis research I’m doing with Carlotta, there still bits that could relate later on, OSC messaging for instance seems to be a really reliable way to ensure connection between different AIoT devices, which could work really well with the energy tracking hardware we’ve developed for our thesis research, that could work really well for communicating data in a way that no other actor could access besides the specified users.